Removing a shower handle may seem like a daunting task, but with the right tools and guidance, it can be accomplished easily. Whether you're replacing a broken handle, upgrading your bathroom fixtures, or performing routine maintenance, understanding the process is essential. This comprehensive guide will walk you through everything you need to know about removing a shower handle safely and effectively.
Shower handles are a critical part of your bathroom's plumbing system, and over time, they can wear out, become loose, or develop leaks. Knowing how to remove and replace them can save you both time and money. In this article, we’ll explore the tools you’ll need, the step-by-step process, and tips to avoid common mistakes. By the end, you’ll feel confident tackling this DIY project on your own.
Before diving into the details, it’s important to note that shower handles come in various designs and mechanisms. Some are simple to remove, while others may require specialized tools. Regardless of the type, this guide will equip you with the knowledge to handle any situation. Let’s get started!
Read also:Who Is Greta Thunbergs Boyfriend Unraveling The Mystery
Table of Contents
- Tools You Need
- Types of Shower Handles
- Step-by-Step Removal Process
- Common Issues and How to Fix Them
- Safety Tips for Removing Shower Handles
- Maintenance Tips to Extend Handle Lifespan
- Specialized Tools for Specific Handles
- When to Call a Professional
- Benefits of DIY Shower Handle Removal
- Conclusion
Tools You Need
To successfully remove a shower handle, you’ll need a few basic tools. Having these items ready will ensure a smooth process and minimize the risk of damaging your plumbing fixtures.
- Flathead Screwdriver: Useful for prying off decorative caps or loosening screws.
- Phillips Screwdriver: Often required for removing screws securing the handle.
- Allen Wrench: Some handles have set screws that require an Allen wrench.
- Needle-Nose Pliers: Helpful for gripping small parts or removing stubborn screws.
- Utility Knife: Can be used to cut through mineral deposits or old caulking.
- Plumber’s Tape: For sealing threads after reinstallation.
Having these tools on hand will make the process easier and more efficient. If you encounter a handle that requires a specialized tool, we’ll cover that later in the article.
Types of Shower Handles
Shower handles come in various types, each with its own mechanism for attachment. Understanding the type of handle you have is crucial for determining the removal process.
Single-Handle Shower
Single-handle showers control both water temperature and flow with one lever. These handles often have a screw or set screw securing them to the valve stem.
Double-Handle Shower
Double-handle showers have separate controls for hot and cold water. Each handle is typically attached with a screw located under a decorative cap.
Lever-Style Handles
Lever-style handles are common in modern bathrooms. They are easy to grip and often secured with a set screw on the side or underside.
Read also:Unraveling The Mystery Of Yodit Tewoldes Husband
Identifying your handle type will help you choose the right tools and techniques for removal.
Step-by-Step Removal Process
Now that you’ve gathered your tools and identified your handle type, let’s dive into the step-by-step process for removing a shower handle.
Step 1: Turn Off the Water Supply
Before starting, ensure the water supply to the shower is turned off. This prevents water from spraying while you work and avoids potential water damage.
Step 2: Remove the Decorative Cap
Many shower handles have a decorative cap covering the screw. Use a flathead screwdriver to gently pry it off. Be careful not to scratch or damage the surface.
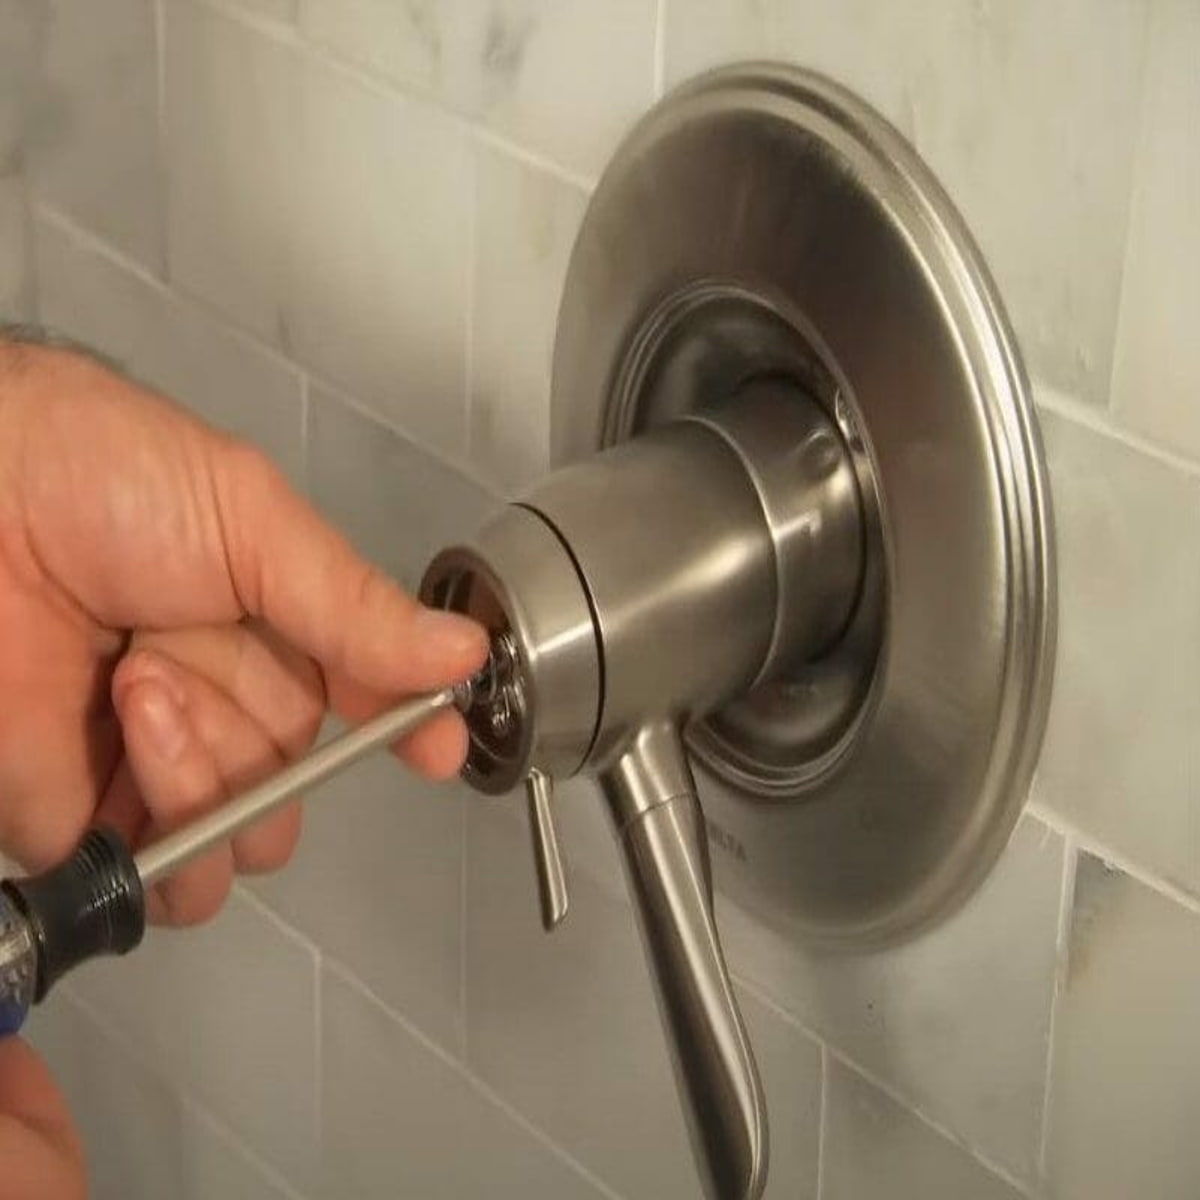
Step 3: Locate and Remove the Screw
Once the cap is removed, you’ll see a screw holding the handle in place. Use the appropriate screwdriver or Allen wrench to loosen and remove the screw.
Step 4: Pull Off the Handle
With the screw removed, gently pull the handle away from the wall. If it’s stuck, wiggle it slightly or use a handle puller tool to avoid damaging the fixture.
Step 5: Inspect and Clean the Area
After removing the handle, inspect the valve stem for mineral deposits or corrosion. Clean the area with vinegar or a descaling solution to ensure smooth operation of the new handle.
Common Issues and How to Fix Them
While removing a shower handle, you may encounter a few common issues. Here’s how to address them:
- Stuck Handle: Apply penetrating oil to loosen rust or mineral buildup. Let it sit for 15-20 minutes before attempting to remove the handle again.
- Stripped Screw: Use a rubber band between the screwdriver and the screw head for better grip. Alternatively, use a screw extractor tool.
- Missing Screw: Some handles are secured with a set screw. Check the underside or side of the handle for a small Allen screw.
By anticipating these issues, you can avoid frustration and ensure a successful removal process.
Safety Tips for Removing Shower Handles
Working with plumbing fixtures requires caution. Follow these safety tips to protect yourself and your bathroom:
- Turn Off the Water Supply: Always turn off the water before starting any plumbing work.
- Use Proper Tools: Avoid using excessive force or improper tools that could damage the handle or plumbing.
- Wear Protective Gear: Use gloves and safety glasses to protect your hands and eyes from debris.
- Work in a Well-Ventilated Area: If using cleaning solutions, ensure proper ventilation to avoid inhaling fumes.
By following these precautions, you can complete the task safely and efficiently.
Maintenance Tips to Extend Handle Lifespan
Regular maintenance can prevent the need for frequent handle replacements. Here are some tips to keep your shower handle in good condition:
- Clean Regularly: Wipe down the handle and surrounding area to remove soap scum and mineral deposits.
- Check for Leaks: Address any leaks promptly to prevent water damage and handle wear.
- Lubricate Moving Parts: Apply plumber’s grease to the valve stem and handle mechanism to ensure smooth operation.
- Inspect for Corrosion: Look for signs of rust or corrosion and clean or replace affected parts as needed.
By incorporating these practices into your routine, you can extend the lifespan of your shower handle and avoid costly repairs.
Specialized Tools for Specific Handles
Some shower handles require specialized tools for removal. Here’s a list of tools you might need for specific handle types:
- Handle Puller: Ideal for removing stubborn handles without damaging the fixture.
- Set Screw Tool: Designed for handles with small set screws that are difficult to access.
- Descaling Solution: Effective for removing mineral deposits around the valve stem.
Investing in these tools can make the removal process easier and more efficient, especially for complex handle designs.
When to Call a Professional
While DIY projects can be rewarding, there are times when calling a professional plumber is the best option. Consider hiring a plumber if:
- You encounter a plumbing issue beyond your skill level.
- The handle is part of an older or custom plumbing system.
- You suspect a deeper issue, such as a leaky valve or damaged pipes.
A professional can ensure the job is done correctly and prevent further damage to your plumbing system.
Benefits of DIY Shower Handle Removal
Taking on a DIY project like removing a shower handle has several advantages:
- Cost Savings: You can save money by avoiding professional labor costs.
- Increased Confidence: Completing the task yourself boosts your DIY skills and confidence.
- Customization Options: You have the freedom to choose and install a handle that matches your style and preferences.
With the right tools and guidance, DIY shower handle removal can be a rewarding and practical project.
Conclusion
Removing a shower handle is a manageable DIY task that can save you time and money. By following the steps outlined in this guide, you can confidently tackle the project and achieve professional results. Remember to gather the necessary tools, identify your handle type, and proceed with caution to avoid damage.
If you encounter any challenges or have questions, feel free to leave a comment below. Share this article with friends or family who might find it helpful, and explore our other guides for more home improvement tips. Happy DIY-ing!